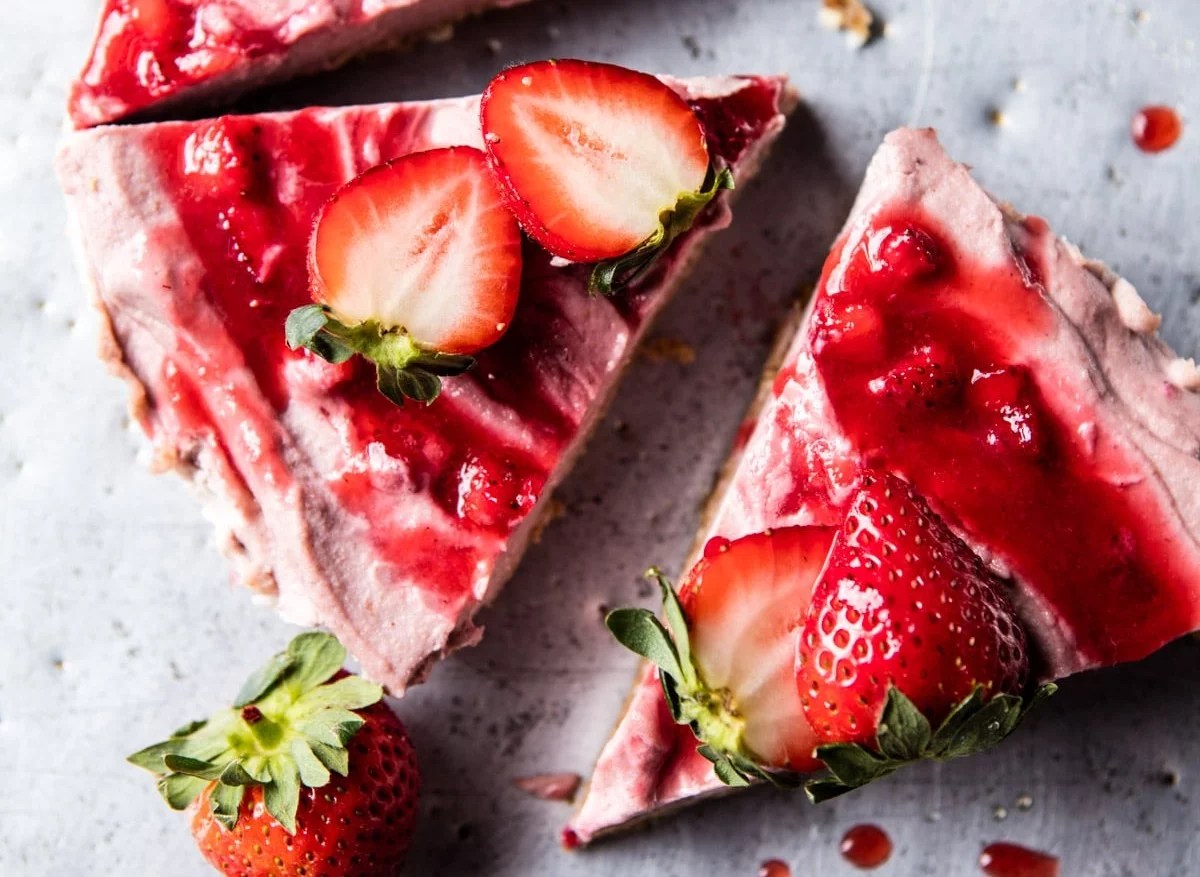
Indulge your sweet tooth without the dairy! This exploration dives into the creamy, dreamy world of decadent dairy-free cheesecakes. We’ll unveil a collection of recipes, each a testament to the surprising versatility of dairy-free alternatives. From the perfectly crisp crust to the luxuriously smooth filling, prepare to be amazed by the textures and flavors achievable without sacrificing richness. Get ready to discover the secrets to creating cheesecakes that are both incredibly delicious and completely dairy-free.
We’ll journey through a variety of crust options, from nutty almond flour to classic graham cracker, exploring their unique textural and flavor contributions. Then, we’ll delve into the art of crafting the perfect filling, mastering techniques to achieve that signature cheesecake creaminess using plant-based ingredients. Finally, we’ll explore a dazzling array of garnishes and presentation ideas to elevate your dairy-free cheesecakes from simple desserts to breathtaking culinary masterpieces.
Garnishing and Presentation Ideas for Dairy-Free Cheesecakes
Creating a truly decadent dairy-free cheesecake involves not only a delicious recipe but also a stunning presentation. The right garnish and serving style can elevate your dessert from good to unforgettable. Careful consideration of these elements will ensure your creation is as visually appealing as it is tasty.
Five Unique Garnishing Ideas
The choice of garnish can significantly impact the overall aesthetic and flavor profile of your dairy-free cheesecake. Here are five unique ideas to inspire your next creation.
- Candied Citrus Peel: Thinly sliced orange or grapefruit peel, candied to a vibrant, glossy finish, offers a beautiful contrast of color and texture. The subtle sweetness complements the richness of the cheesecake, adding a sophisticated touch.
- Fresh Berry Coulis with Mint Sprigs: A vibrant coulis, made by blending fresh berries like raspberries or strawberries, creates a visually striking pool of color around the base of the cheesecake. Adding a few fresh mint sprigs adds a touch of green and a refreshing aroma.
- Toasted Coconut Flakes and Chocolate Shavings: The combination of toasted coconut flakes, offering a warm, nutty aroma and texture, with dark chocolate shavings provides a decadent contrast of textures and flavors. The dark brown and white colors create a visually appealing pattern.
- Edible Flowers: Delicate edible flowers, such as pansies or violas, add a touch of elegance and whimsy. Their vibrant colors and intricate details create a truly artistic garnish. Choose flowers specifically grown for consumption.
- Caramel Drizzle with Sea Salt: A rich caramel drizzle, carefully drizzled in a swirling pattern across the top, adds a touch of sweetness and visual interest. Sprinkling a few flakes of sea salt enhances the caramel’s sweetness and creates a beautiful textural contrast.
Presentation Styles for Dairy-Free Cheesecakes
The way you present your dairy-free cheesecake can dramatically impact its perceived value and appeal. Different occasions call for different styles.
| Presentation Style | Description | Visual Description | Serving Suggestion |
|---|---|---|---|
| Individual Servings | Small, elegant portions served in individual ramekins or glasses. | Imagine miniature cheesecakes, each a perfect bite, nestled in clear glass ramekins, showcasing the creamy texture and layered design. | Perfect for parties or special occasions where individual portions are desired. |
| Large Cake | A classic, impressive presentation, ideal for larger gatherings. | A magnificent, smooth cheesecake, perhaps adorned with a delicate fruit arrangement or chocolate latticework, sitting proudly on a cake stand. | Suitable for birthdays, celebrations, or when making a statement is key. |
| Layered Dessert | Combining the cheesecake with other elements, such as fruit compotes or cookie crumbles, creating a visually interesting layered effect. | Picture a glass dessert cup, showcasing alternating layers of creamy cheesecake, vibrant berry compote, and crunchy biscuit crumbs, creating a stunning vertical design. | Offers variety in texture and flavor, ideal for a sophisticated dessert experience. |
| Cheesecake Parfaits | Cheesecake layered in a glass with other elements such as granola, berries and whipped cream. | Imagine a tall, clear glass filled with alternating layers of creamy cheesecake, crunchy granola, juicy berries, and fluffy whipped cream. The different textures and colors create a visually appealing parfait. | A lighter and more casual option for a buffet or a less formal setting. |
Creating a Visually Stunning Cheesecake
To create a truly show-stopping dairy-free cheesecake, consider combining the fresh berry coulis with mint sprigs garnish with a layered dessert presentation. The vibrant red and green of the coulis and mint would beautifully contrast with the creamy white cheesecake, especially when served in a clear glass dessert cup. The layering of the cheesecake, perhaps with a layer of gluten-free biscuit crumbs at the bottom for added texture, would enhance the visual appeal. The overall effect would be a refreshing, elegant, and utterly delicious dessert.
Step-by-Step Guide to Creating a Classic Dairy-Free Cheesecake

This recipe guides you through making a luxuriously smooth and creamy dairy-free cheesecake, perfect for satisfying any sweet tooth without compromising on flavor or texture. We’ll use cashews as our creamy base, resulting in a rich and decadent dessert. The process is straightforward, but attention to detail will yield the best results.
Crust Preparation
First, we create the foundation of our delightful cheesecake: the crust. A simple yet effective crust provides the perfect textural contrast to the creamy filling.
- Preheat your oven to 350°F (175°C). The oven’s warmth ensures a perfectly baked crust.
- In a food processor, combine 1 ½ cups of gluten-free graham cracker crumbs (or digestive biscuits), ¼ cup of unsweetened shredded coconut, and 6 tablespoons of melted dairy-free butter (coconut oil works well). The mixture should resemble wet sand.
- Press the crumb mixture firmly into the bottom of a 9-inch springform pan. Use the bottom of a measuring cup or your fingers to ensure an even layer. The resulting crust will be a light golden brown.
- Bake for 10-12 minutes, or until lightly golden. Keep a close eye on it to prevent burning. The crust will firm up as it bakes, becoming a solid base.
- Remove from the oven and let cool completely on a wire rack. This allows the crust to set fully before adding the filling.
Filling Preparation
The filling is where the magic happens, transforming simple ingredients into a creamy, dreamy cheesecake.
- Soak 1 ½ cups of raw cashews in hot water for at least 30 minutes, or preferably overnight. This soaking process softens the cashews, resulting in a smoother, creamier texture. The cashews will plump up noticeably.
- Drain the soaked cashews and add them to a high-speed blender along with 1 cup of full-fat coconut milk (from a can, refrigerated overnight for best results), ½ cup of maple syrup (or agave nectar), 2 tablespoons of lemon juice, 1 teaspoon of vanilla extract, and a pinch of salt. The mixture will appear quite thick and creamy.
- Blend until completely smooth and creamy. Scrape down the sides of the blender as needed. The final consistency should be incredibly smooth, resembling a thick, creamy sauce. Any remaining cashew pieces indicate the need for further blending.
- Pour the cashew cream mixture over the cooled crust. The filling should evenly coat the crust, creating a uniform layer.
- Place the springform pan into a larger roasting pan. Pour enough hot water into the larger pan to come halfway up the sides of the springform pan. This creates a water bath, preventing cracking and ensuring even baking. The water bath should gently surround the cheesecake.
- Bake in a preheated 325°F (160°C) oven for 50-60 minutes, or until the cheesecake is set around the edges but still slightly jiggly in the center. The cheesecake will take on a slightly golden hue.
- Turn off the oven and leave the cheesecake in the oven with the door slightly ajar for another hour. This slow cooling process prevents cracking. The cheesecake will begin to set more firmly.
- Remove the cheesecake from the oven and the water bath. Let it cool completely on a wire rack before refrigerating for at least 4 hours, or preferably overnight. This allows the cheesecake to fully set and chill, enhancing its creamy texture. The cheesecake will become noticeably firmer during this chilling period.
Troubleshooting
Potential challenges include cracking and a grainy texture. Cracking can be avoided by using a water bath and allowing the cheesecake to cool slowly. A grainy texture usually results from insufficiently blended cashews; ensure you blend until completely smooth. If the cheesecake is too runny after baking, refrigerate for longer.
Creating exquisite dairy-free cheesecakes is an adventure in culinary innovation, proving that indulgence and dietary needs can coexist beautifully. Through exploring diverse crusts, fillings, and presentation styles, we’ve unlocked the potential for truly decadent desserts that are both delicious and accessible to everyone. So, gather your ingredients, embrace your creativity, and embark on your own dairy-free cheesecake journey. The possibilities are as limitless as your imagination!
Questions Often Asked
Can I make the cheesecakes ahead of time?
Yes! Dairy-free cheesecakes generally benefit from chilling for several hours, or even overnight, to allow the flavors to meld and the texture to set properly.
What are the best dairy-free cream cheese substitutes?
Cashew cream, tofu, and coconut cream are popular and effective substitutes, each offering a slightly different texture and flavor profile.
How do I prevent cracking in my dairy-free cheesecake?
Baking at a lower temperature for a longer time, using a water bath, and allowing the cheesecake to cool slowly can all help prevent cracking.
Can I freeze dairy-free cheesecakes?
Yes, but it’s best to freeze them unfrosted. Wrap them tightly in plastic wrap and then foil before freezing. Thaw completely in the refrigerator before serving.


