Discover the delightful world of egg-free chia pudding, a culinary adventure that tantalizes taste buds and nourishes the body. This guide unveils the secrets to crafting creamy, dreamy chia pudding without a single egg, exploring diverse flavor profiles and textures. From the initial ingredient selection to the final flourish of presentation, we’ll embark on a journey to create a chia pudding experience that’s nothing short of pure bliss.
We’ll delve into ingredient substitutions, showcasing how various thickeners and flavor enhancers contribute to the pudding’s unique character. Learn how to achieve the perfect consistency, from thick and creamy to delightfully runny, by mastering the liquid-to-chia seed ratio. With step-by-step instructions and creative serving suggestions, you’ll be amazed at the versatility and elegance of this simple yet extraordinary dessert.
Step-by-Step Preparation Guide

Creating a creamy, dreamy chia pudding without eggs is surprisingly simple. This guide will walk you through each phase of the process, from initial preparation to the final, delightful spoonful. Following these steps will ensure a perfectly textured and flavorful pudding every time.
Preparation Phase: Gathering Ingredients and Equipment
Before you begin, gather all your ingredients and equipment. This simple preparation step prevents mid-process disruptions and ensures a smooth workflow. You’ll need a jar or bowl for mixing, a measuring cup, a measuring spoon, and a refrigerator. The ingredients are equally straightforward: chia seeds, your choice of milk (dairy or non-dairy), and your preferred sweetener (maple syrup, honey, or agave nectar work well). Consider adding vanilla extract for an extra touch of flavor.
Mixing Phase: Combining Ingredients for a Smooth Texture
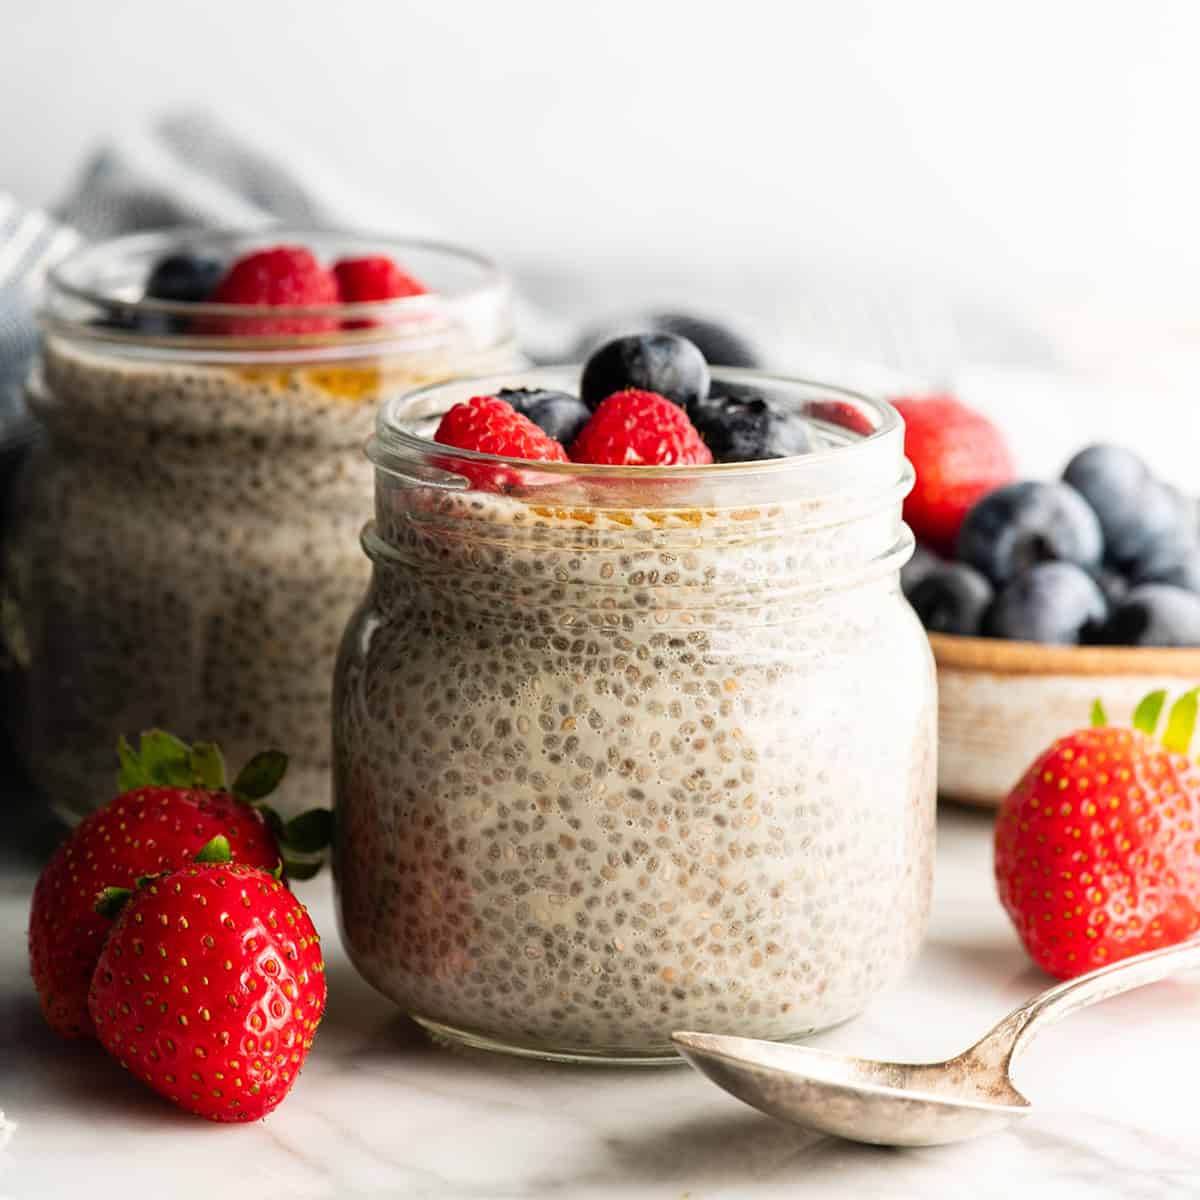
In your chosen jar or bowl, combine 1/4 cup of chia seeds with 1 cup of your selected milk. Stir vigorously for at least 30 seconds to ensure the chia seeds are fully incorporated and no clumps form. This initial mixing is crucial for preventing a gritty texture in the final product. Next, add your sweetener – start with 1-2 tablespoons and adjust to your taste preference. A teaspoon of vanilla extract adds a delightful aroma and complements the sweetness. Stir gently until the sweetener is fully dissolved.
Chilling Phase: Allowing the Pudding to Set
Once the ingredients are thoroughly mixed, cover the jar or bowl tightly with a lid or plastic wrap. Place it in the refrigerator for at least 4 hours, or preferably overnight. This chilling phase is essential for allowing the chia seeds to absorb the liquid and create the characteristic pudding consistency. The longer it chills, the thicker and creamier your pudding will become. Avoid stirring during the chilling period, as this can disrupt the setting process.
Serving Phase: Presentation and Enjoyment
After the chilling period, gently stir the pudding before serving. If it’s too thick, you can add a splash more milk to adjust the consistency. Serve the chia pudding directly from the jar or transfer it to a bowl for a more elegant presentation. Get creative with toppings! Fresh berries, sliced bananas, shredded coconut, or a drizzle of nut butter are all delicious additions that enhance both the flavor and visual appeal. A sprinkle of cinnamon adds warmth and complexity.
Troubleshooting Common Mistakes and Solutions
A common mistake is insufficient stirring during the initial mixing phase. This can result in a lumpy or gritty texture. If this occurs, simply blend the pudding briefly with an immersion blender or whisk vigorously to break up any remaining clumps. Another issue is the pudding being too thick or too thin. If it’s too thick, add a little more milk. If it’s too thin, let it chill for a longer period. Remember, patience is key to achieving the perfect consistency. Finally, if your pudding develops an unpleasant taste, this is most likely due to using spoiled ingredients. Always ensure your milk and sweetener are fresh.
Creating an egg-free chia pudding that’s pure bliss is surprisingly simple and incredibly rewarding. This guide has equipped you with the knowledge and techniques to craft a delicious and healthy treat, tailored to your preferences. Experiment with flavors, textures, and presentations to discover your signature chia pudding masterpiece. With each spoonful, savor the creamy texture and the burst of delightful flavors – a testament to the magic of simple ingredients and culinary creativity. Enjoy the journey of creating your own personal slice of pudding paradise!
FAQ Section
Can I make chia pudding ahead of time?
Absolutely! Chia pudding tastes even better after chilling in the refrigerator for at least 2-4 hours, allowing the chia seeds to fully absorb the liquid and create a smoother texture.
What if my chia pudding is too thick or too thin?
Adjust the liquid-to-chia seed ratio. For a thinner pudding, add more liquid; for a thicker pudding, reduce the liquid. You can also add a bit of milk or yogurt to thin it out.
How long does egg-free chia pudding last in the refrigerator?
Properly stored in an airtight container in the refrigerator, egg-free chia pudding will typically last for 3-5 days.
Can I freeze chia pudding?
Yes, you can freeze chia pudding. Thaw it overnight in the refrigerator before serving. The texture might be slightly altered after freezing.


