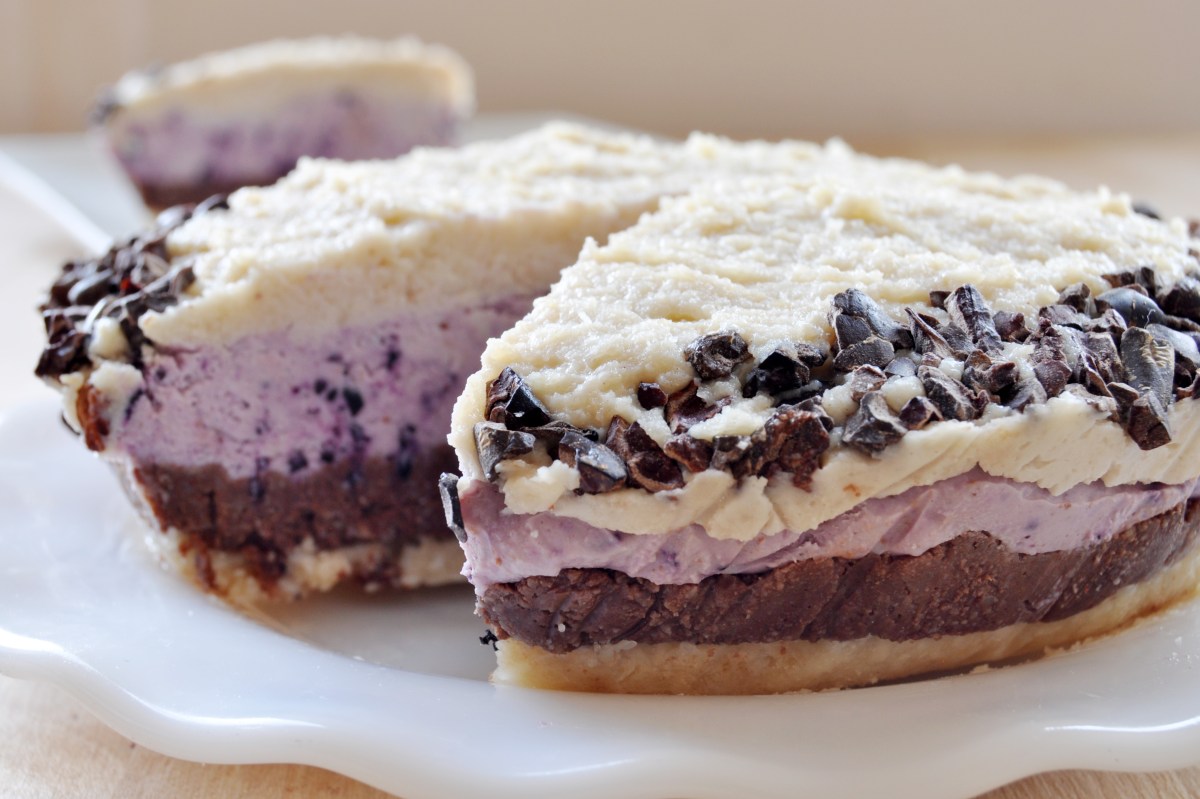
Imagine sinking your teeth into a flawlessly smooth, creamy cheesecake, bursting with vibrant, natural flavors – all without the guilt of refined sugar or dairy. This isn’t a dream; it’s the delicious reality of a perfectly crafted raw vegan cheesecake. We’ll guide you through each step, from selecting the ideal ingredients and crafting a delectable crust to achieving that unbelievably smooth filling and creating a stunning presentation that’s as captivating as the taste.
This comprehensive guide delves into the art of creating a raw vegan cheesecake that rivals – and perhaps surpasses – its traditional counterparts. We’ll explore various crust techniques, filling variations, and decorative options, empowering you to create a masterpiece tailored to your preferences. Get ready to unlock the secrets to a truly unforgettable dessert experience.
Crust Creation Techniques

Crafting the perfect raw vegan cheesecake begins with a flawlessly executed crust. The crust provides a delightful textural contrast to the creamy filling and serves as the foundation for the entire dessert. Choosing the right method and ingredients is crucial for achieving a crust that’s both delicious and structurally sound. This section will explore three popular methods, highlighting their unique advantages and disadvantages.
Date-Based Crusts
Date-based crusts offer a naturally sweet and intensely flavorful base. Medjool dates, in particular, provide a rich, caramel-like sweetness and a wonderfully sticky texture that binds the crust together beautifully. The inherent moisture in dates also contributes to a more tender, less crumbly crust. However, over-processing can lead to a gummy or overly dense crust. Furthermore, the intense sweetness of dates may overpower more delicate cheesecake fillings.
Nut-Based Crusts
Nut-based crusts, often using almonds, cashews, or pecans, provide a satisfying crunch and nutty flavor. These nuts offer a good source of healthy fats and protein, contributing to a more substantial crust. The texture can range from slightly crumbly to more firm, depending on the type of nut and the processing method. A disadvantage is that nut-based crusts can be quite dry if not enough oil or binding agent is added. They also tend to be more expensive than other options.
Seed-Based Crusts
Seed-based crusts, often incorporating sunflower seeds, pumpkin seeds, or flax seeds, offer a unique nutty and slightly earthy flavor profile. These seeds are a powerhouse of nutrients and provide a good source of healthy fats and fiber. They create a crust with a lighter texture compared to nut-based options, often resulting in a more delicate and less dense base. However, seed-based crusts can be more challenging to press into the pan due to their smaller size and less cohesive nature; they might require a stronger binding agent.
Gluten-Free and Refined Sugar-Free Crust Recipe
This recipe utilizes almonds, dates, and coconut oil to create a naturally sweet, gluten-free, and refined sugar-free crust.
Ingredients:
* 1 ½ cups raw almonds
* ¾ cup pitted Medjool dates, packed
* ¼ cup unsweetened shredded coconut
* 2 tablespoons coconut oil, melted
Rationale:
* Almonds: Provide a nutty flavor, healthy fats, and a good base for texture.
* Dates: Offer natural sweetness and act as a binding agent.
* Coconut: Adds subtle sweetness and enhances the overall flavor profile.
* Coconut oil: Provides moisture and helps bind the ingredients together, creating a cohesive crust.
Pressing the Crust into the Pan
Pressing the crust evenly into the pan is crucial for achieving a uniform thickness and preventing cracking. Begin by thoroughly processing the crust ingredients in a food processor until they resemble a coarse meal with small clumps. The mixture should hold its shape when pressed together. If it is too dry, add a teaspoon of melted coconut oil at a time. If it’s too wet, add a tablespoon of almond flour at a time.
Visual Cue 1: The mixture should be cohesive enough to form a ball when squeezed in your hand, but not so sticky that it clings to your fingers.
Imagine a picture: A handful of the crust mixture is compressed in the palm of a hand. It forms a firm, slightly textured ball that doesn’t immediately crumble.
Step-by-Step Guide:
1. Firmly press the crust mixture into the bottom of a springform pan or a tart pan with a removable bottom. Use the bottom of a measuring cup or the back of a spoon to create an even layer.
2. Pay close attention to the edges, ensuring the crust is pressed firmly against the sides of the pan.
3. Visual Cue 2: The crust should be evenly distributed, with no visible gaps or uneven patches. The surface should appear smooth and compact. Imagine a picture: The crust is uniformly pressed into the pan, creating a smooth, level surface with no lumps or air pockets. The edges are neatly aligned with the pan’s sides.
4. For a perfectly flat surface, use the bottom of a flat-bottomed glass to gently press down on the crust, ensuring even compression.
5. Refrigerate the crust for at least 30 minutes to firm up before adding the cheesecake filling. This prevents the crust from becoming soggy.
Creating the perfect raw vegan cheesecake is a journey of culinary exploration, blending artistry with precise technique. From the satisfying crunch of the carefully crafted crust to the luscious smoothness of the filling, each element contributes to an unforgettable sensory experience. By mastering the techniques and embracing the versatility of this recipe, you’ll not only delight your taste buds but also impress your friends and family with a show-stopping dessert that’s as healthy as it is delicious. So, gather your ingredients, embrace the process, and prepare to create a raw vegan cheesecake masterpiece.
Popular Questions
Can I use frozen fruit in the filling?
Yes, but be sure to thaw it completely and drain any excess liquid before blending to prevent a watery filling.
How long can I store the cheesecake?
Store your cheesecake in an airtight container in the refrigerator for up to 5 days. The texture might change slightly after a few days, but it will still be delicious.
What if my crust is too crumbly?
A crumbly crust might indicate insufficient moisture. Try adding a tablespoon or two more of your chosen liquid (date paste, nut butter, etc.) and pulse again until it just holds together.
Can I make this cheesecake ahead of time?
Absolutely! In fact, chilling the cheesecake overnight enhances its flavor and texture. Make it a day or two before serving for optimal results.


