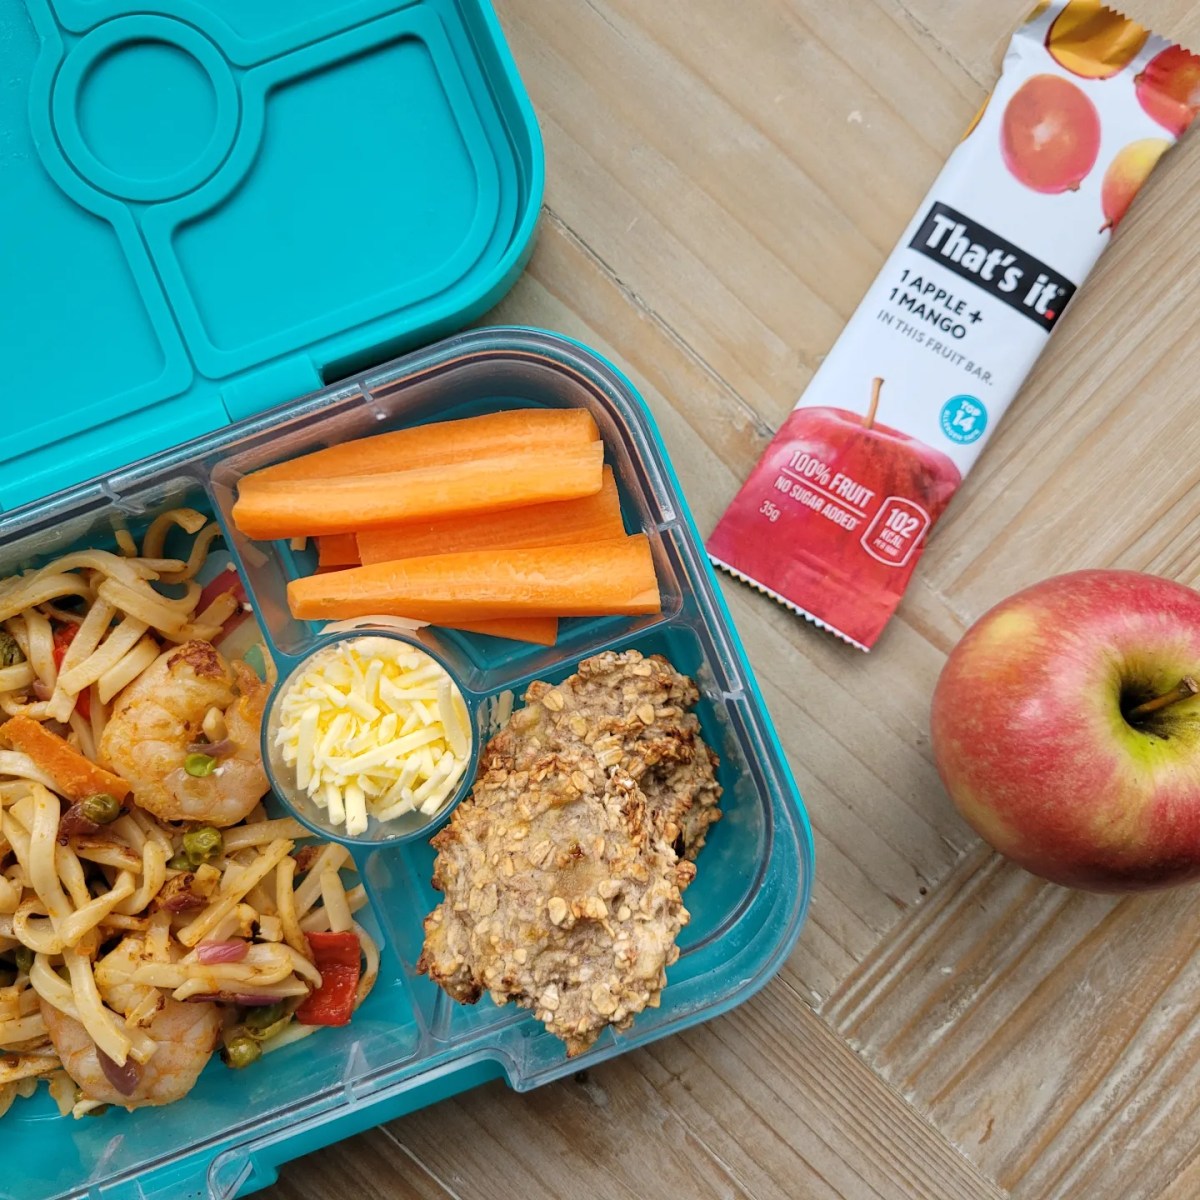
Picture this: a lunchbox bursting with vibrant colors, tantalizing aromas, and nutritious dairy-free delights. No more sad, soggy sandwiches or bland, repetitive meals! This guide unveils the secrets to crafting the perfect dairy-free lunchbox, a culinary adventure that’s both healthy and exciting. We’ll explore essential ingredients, creative main course ideas, and healthy snacks, all while ensuring your lunches are visually appealing and packed with flavor.
From mastering the art of dairy-free yogurt preparation to constructing mouthwatering hummus wraps, we’ll cover everything you need to know. Learn how to choose nutritious dairy-free milk alternatives, incorporate whole grains and legumes, and pack lunches that even the pickiest eaters will adore. Get ready to transform lunchtime from a mundane chore into a delicious experience!
Dairy-Free Lunchbox Essentials

Packing a nutritious and delicious dairy-free lunchbox requires careful planning and selection of ingredients. Choosing the right components ensures your lunch is both satisfying and avoids any unwanted dairy-related reactions. This section will Artikel key ingredients and provide guidance on preparation and storage.
Dairy-Free Lunchbox Staples
A well-stocked pantry provides the foundation for creating diverse and exciting dairy-free lunches. These five essential ingredients offer versatility and nutritional value, making them perfect for a variety of lunchbox creations.
- Fruits: Apples, bananas, berries, and grapes offer natural sweetness and essential vitamins. Their portability and minimal preparation make them ideal lunchbox additions.
- Vegetables: Carrots, celery, bell peppers, and cherry tomatoes provide vibrant color and crucial nutrients. Pre-cut vegetables save time and are easy to pack.
- Whole Grains: Whole-wheat bread, crackers, or quinoa provide sustained energy and fiber. Look for options with minimal added sugar.
- Legumes: Hummus, edamame, or chickpeas offer a fantastic source of protein and fiber. They add satisfying texture and flavor to lunches.
- Dairy-Free Milk Alternatives: Unsweetened almond milk, soy milk, or oat milk provide a refreshing beverage and can be used in recipes. Choose varieties fortified with calcium and vitamin D.
Comparison of Dairy-Free Milk Alternatives
Understanding the nutritional differences between various dairy-free milk alternatives helps in making informed choices for a balanced lunchbox. The following table compares three popular options:
| Name | Calories (per cup) | Protein (grams per cup) | Fat (grams per cup) |
|---|---|---|---|
| Unsweetened Almond Milk | 30-40 | 1-2 | 2.5-5 |
| Unsweetened Soy Milk | 80-100 | 7-8 | 2-4 |
| Unsweetened Oat Milk | 100-120 | 2-4 | 2-5 |
*Note: Nutritional values can vary slightly depending on the brand.
Preparing and Storing Dairy-Free Yogurt for Lunchboxes
Dairy-free yogurt is a creamy and protein-rich addition to any lunchbox. Homemade options offer greater control over ingredients and sweetness.
- Choose your base: Select a dairy-free milk alternative like coconut milk, almond milk, or soy milk. Ensure it’s unsweetened for better control over the final sweetness.
- Add a starter culture: Use a dairy-free yogurt starter culture or a small amount of store-bought dairy-free yogurt (check the label for live and active cultures). This ensures proper fermentation.
- Incubate: Pour the milk mixture into a clean jar and stir in the starter culture. Cover loosely and let it sit in a warm place (around 110-115°F) for 6-12 hours, or until thickened. A yogurt maker can be helpful, but a warm oven with the light on will also work.
- Cool and store: Once thickened, refrigerate the yogurt for at least 4 hours to further set and cool. Store in airtight containers in the refrigerator for up to 5 days.
- Pack for lunch: Spoon the yogurt into a reusable container, adding fruit, granola, or seeds for extra flavor and texture. A small ice pack can help keep it cool throughout the day.
Packing Tips and Tricks
Creating a delightful and nutritious dairy-free lunchbox requires more than just selecting the right ingredients; it’s about thoughtful preparation and smart packing techniques. A well-packed lunchbox ensures freshness, prevents spills, and keeps food appealing throughout the day, encouraging healthy eating habits. The following tips will guide you in crafting the perfect dairy-free lunchbox experience.
Preserving Freshness and Appeal
Maintaining the freshness and visual appeal of dairy-free lunchbox contents is key to ensuring they’re enjoyed. Proper packing methods can significantly impact the overall lunchbox experience, making it more enticing and less prone to spoilage.
- Layer for Temperature Control: Place items that need to stay cold, like fruits or pre-made dairy-free salads, at the bottom of the lunchbox, nestled against an ice pack. This creates a natural cooling effect for the entire contents. Imagine a vibrant green salad layered beneath a container of chilled dairy-free yogurt, all kept cool by a discreet blue ice pack.
- Separate Sauces and Dressings: Pack sauces and dressings in separate small containers to prevent soggy sandwiches or salads. This ensures the flavors remain distinct and the food retains its texture. Picture a small, clear container of vibrant balsamic vinaigrette separate from a hearty chickpea salad sandwich, maintaining the crunch and avoiding a soggy mess.
- Use Insulated Containers: Insulated containers, particularly those with vacuum sealing, are excellent for maintaining the temperature of both hot and cold foods. They help preserve the quality and taste, preventing temperature-related spoilage. Envision a sleek, stainless steel thermos keeping your child’s dairy-free lentil soup piping hot until lunchtime.
- Pack Crunchy Items Separately: Crisp vegetables and chips can become soggy if packed directly with other foods. Keeping them in their own airtight container will maintain their texture and prevent them from absorbing moisture. Think of a colorful array of carrot sticks and cucumber slices, stored in a separate, airtight container, maintaining their satisfying crunch.
- Pack in Stages: Prepare components of the lunchbox the night before, but add items like fresh fruit or delicate vegetables just before packing to maintain optimal freshness. This staged approach maximizes the lifespan of the contents. Visualize the efficiency: pre-made dairy-free wraps neatly stacked, with fresh berries added right before departure, ensuring peak freshness.
Reusable Containers and Waste Reduction
Using reusable containers is a significant step towards reducing food waste and promoting environmental sustainability. It not only helps preserve the environment but also saves money in the long run.
Investing in high-quality, reusable containers is an investment in a healthier planet and a more economical approach to lunch packing.
Enhancing Visual Appeal for Children
Making dairy-free lunchboxes visually appealing is crucial for encouraging children to eat healthy foods. A colorful and engaging presentation can significantly increase their willingness to consume nutritious meals.
- Use Fun Cutters: Use cookie cutters to create fun shapes from sandwiches, fruits, and vegetables. Imagine a smiling sun made from a dairy-free cheese alternative and a vibrant rainbow crafted from colorful bell peppers.
- Creative Food Arrangements: Arrange food items in an aesthetically pleasing manner within the lunchbox. Think of a playful arrangement of dairy-free yogurt with granola, berries, and nuts, creating a visually stimulating and healthy parfait.
- Include a Small Note or Drawing: A small, handwritten note or a simple drawing can add a personal touch and make the lunchbox feel more special. Picture a cheerful, hand-drawn cartoon character accompanying a delicious dairy-free pasta salad.
Creating a dairy-free lunchbox is not just about avoiding dairy; it’s about embracing a world of flavor and nutrition. By following these tips and recipes, you can confidently pack lunches that are both delicious and satisfying. Remember, a little creativity and planning can go a long way in making lunchtime a highlight of the day. So ditch the dairy and dive into a vibrant, exciting, and healthy lunchbox experience!
FAQ Resource
Can I freeze dairy-free lunch components?
Yes, many dairy-free components like fruits, vegetables, and even some prepared meals can be frozen for later use. However, check individual items for freezing suitability.
What if my child has allergies beyond dairy?
Always check ingredient labels carefully and adapt recipes to suit your child’s specific dietary needs and allergies. Consult with a doctor or registered dietitian for personalized advice.
How can I make my dairy-free lunchbox more environmentally friendly?
Use reusable containers, beeswax wraps, or silicone bags instead of plastic wrap. Choose sustainably sourced ingredients and minimize food waste by planning meals carefully.
How do I ensure my dairy-free lunch stays fresh all day?
Use an insulated lunch bag with an ice pack. Pack foods that don’t wilt easily, and consider separating moist and dry components to prevent sogginess.


