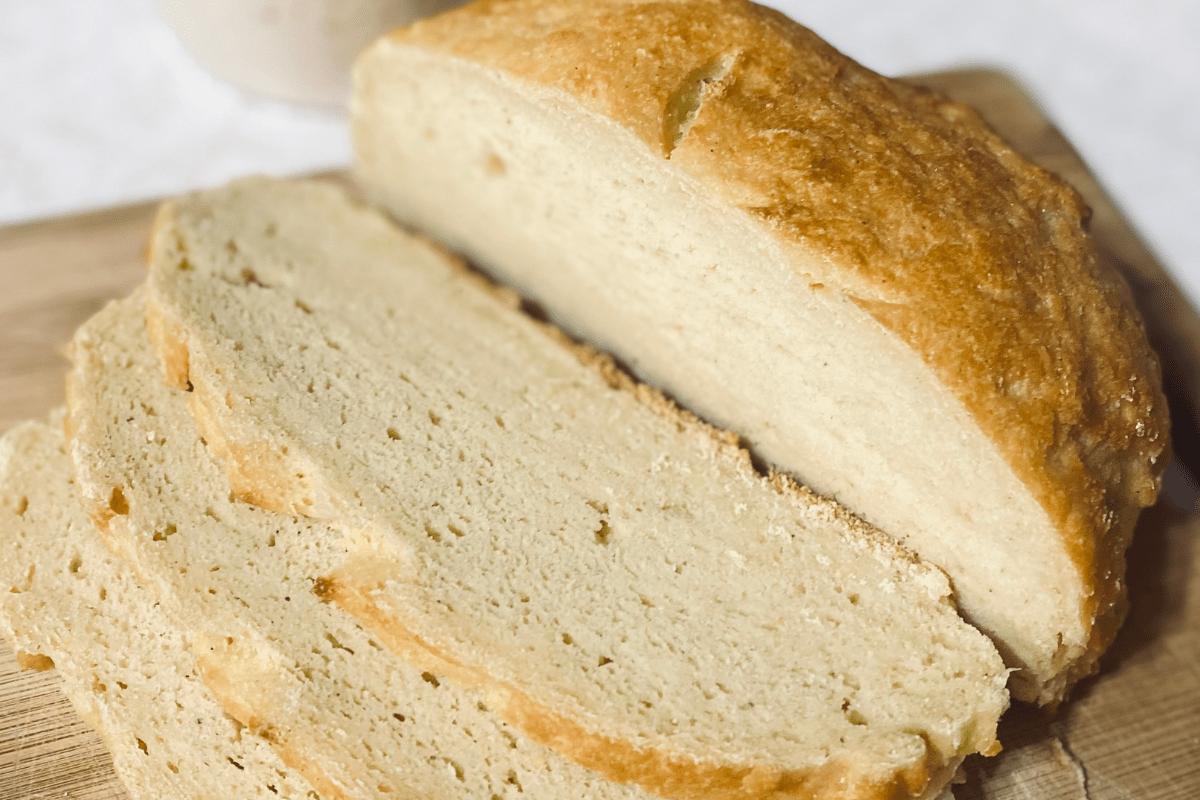
Unlock the secrets to crafting the perfect gluten-free sourdough bread! This recipe journey transcends typical gluten-free baking, delivering a loaf with a depth of flavor and texture that rivals its gluten-containing counterparts. Imagine a crust, crackling with golden-brown perfection, yielding to a soft, airy crumb – a testament to the power of sourdough fermentation and carefully selected gluten-free flour blends. Prepare to be amazed as we explore variations, techniques, and troubleshooting tips, guiding you to sourdough success.
We’ll delve into three unique gluten-free flour blends, each imparting its own distinct character to the final product. From the subtle nuances of flavor to the dramatic variations in crumb structure and crust color, we’ll analyze the impact of each blend, providing a comprehensive comparison table for easy reference. Master the art of sourdough fermentation, navigating the step-by-step process with detailed instructions and vibrant imagery, ensuring your bread rises to its full potential. Learn to troubleshoot common issues, transforming potential baking mishaps into opportunities for learning and improvement.
Recipe Variations
This section explores three variations on a gluten-free sourdough bread recipe, each employing a different blend of gluten-free flours. The choice of flour blend significantly impacts the final product’s texture, flavor, and nutritional profile. Understanding these nuances allows for tailoring the recipe to individual preferences and dietary needs.
Gluten-Free Flour Blends and Their Impact
The three variations utilize different combinations of gluten-free flours to achieve distinct bread characteristics. Each blend presents unique challenges and rewards in terms of texture, flavor development, and overall baking experience. Careful consideration of the flour’s properties – its absorption, protein content, and tendency to produce a gummy or dry crumb – is crucial for success.
Recipe Variations: A Comparative Analysis
The following table summarizes the three gluten-free sourdough bread recipes, highlighting the key differences in flour blend, hydration, fermentation time, and resulting bread characteristics. Visual descriptions of the final product are included to aid in understanding the impact of each flour blend.
| Flour Blend | Hydration Level (%) | Fermentation Time (approx.) | Bread Characteristics |
|---|---|---|---|
| 70% Brown Rice Flour, 30% Tapioca Starch | 75% | 18-24 hours bulk fermentation, 4-6 hours proof | Light brown crust with a slightly glossy sheen; crumb is tender, somewhat delicate, and slightly moist; mild, slightly sweet flavor. |
| 50% Sorghum Flour, 30% Sweet Rice Flour, 20% Potato Starch | 78% | 20-26 hours bulk fermentation, 5-7 hours proof | Deep golden-brown crust with a slightly rough texture; crumb is more open and airy than the brown rice/tapioca blend, with a slightly chewy texture; nutty and subtly sweet flavor with a hint of earthiness from the sorghum. |
| 60% Almond Flour, 25% Cassava Flour, 15% Tigernut Flour | 70% | 16-20 hours bulk fermentation, 3-5 hours proof | Rich golden-brown crust with a crisp texture; crumb is dense and slightly moist, with a noticeably more substantial texture than the other blends; nutty and subtly sweet flavor with a hint of almond prominence. |
Advantages and Disadvantages of Flour Blends
Each gluten-free flour blend offers distinct advantages and disadvantages regarding nutritional value and baking properties. Understanding these trade-offs is crucial for selecting the best blend to suit individual needs and preferences.
Brown rice flour and tapioca starch blend: This blend is relatively inexpensive and readily available. However, it can produce a bread that is slightly less flavorful and more prone to crumbling compared to blends with higher protein content. Brown rice flour contributes some fiber and B vitamins.
Sorghum, sweet rice, and potato starch blend: This blend results in a bread with a more open crumb and a richer flavor. Sorghum flour provides a good source of protein and minerals. However, this blend may require more careful attention during fermentation due to the higher hydration level.
Almond, cassava, and tigernut flour blend: This blend yields a dense, flavorful bread with a unique texture. Almond flour contributes healthy fats and protein. However, this blend is more expensive than the others and may require adjustments to the recipe due to the higher fat content of almond flour. The bread might also have a slightly shorter shelf life.
Step-by-Step Baking Process
This gluten-free sourdough bread recipe requires careful attention to detail, particularly during the fermentation stages. The lack of gluten necessitates a different approach to achieving a light and airy crumb. This detailed guide will walk you through each step, ensuring success even for novice bakers. Remember, patience is key when working with sourdough.
Mixing the Levain (Sourdough Starter Build)
The levain is a crucial component, providing the necessary fermentation power for our gluten-free loaf. A strong levain ensures a well-risen, flavorful bread. This step involves feeding your active sourdough starter to create a larger, more potent levain.
- In a medium bowl, combine 50g of ripe, bubbly sourdough starter (it should resemble a honeycomb in texture, light and airy, with visible bubbles) with 50g of lukewarm water. Mix gently until well combined.
- Add 50g of gluten-free bread flour blend (a blend containing rice flour, tapioca starch, and potato starch works well). Mix thoroughly until a smooth, thick paste forms. The mixture should be slightly sticky.
- Cover the bowl with plastic wrap or a damp kitchen towel and let it rest in a warm place (around 75-80°F) for 4-6 hours, or until doubled in size and bubbly. The levain should be noticeably larger and have significantly increased in volume, showing active fermentation.
Mixing the Dough
This stage involves combining the levain with the remaining ingredients to form the bread dough. Accuracy in measuring is essential for achieving the desired texture and rise.
- In a large bowl, combine 300g of lukewarm water, 50g of olive oil, and 10g of salt. Stir until the salt is dissolved.
- Add the fully fermented levain from the previous step to the wet ingredients. Mix well to incorporate.
- Gradually add 500g of your gluten-free bread flour blend. Mix with a wooden spoon or spatula until a shaggy dough forms. The dough will be quite sticky; this is normal for a gluten-free sourdough.
- Cover the bowl and let it rest for 30 minutes to allow the flour to fully hydrate. This autolyse step helps develop the dough’s structure.
Bulk Fermentation
Bulk fermentation is where the magic happens—the yeast and bacteria in the sourdough starter produce gases, causing the dough to rise. This stage is crucial for developing flavor and texture.
- After the autolyse, gently fold the dough every 30 minutes for the first 2 hours. This strengthens the dough and distributes the yeast evenly. Folding involves reaching into the dough with a lightly floured hand, gently lifting a portion of the dough, stretching it upwards, and folding it over onto itself. Repeat this process from all sides of the bowl.
- Continue to bulk ferment the dough for another 3-4 hours, or until it has increased in volume by approximately 50%. The dough should be puffy and airy, showing signs of significant fermentation.
Shaping and Proofing
Shaping the dough helps create a consistent loaf with a beautiful crust. The proofing stage allows for a final rise before baking.
- Gently turn the dough out onto a lightly floured surface. Shape the dough into a round or oval loaf. The dough remains relatively soft and sticky, so handle it gently.
- Place the shaped loaf into a well-floured banneton basket (or a bowl lined with a floured linen cloth). Cover and let it proof in the refrigerator for 12-18 hours. The dough will slowly rise during this cold proof.
Baking
The final step – baking the bread – transforms the proofed dough into a delicious gluten-free sourdough loaf.
- Preheat your oven to 450°F (232°C) with a Dutch oven inside for at least 30 minutes. The Dutch oven creates a steamy environment, promoting a crisp crust.
- Carefully remove the hot Dutch oven from the oven. Gently invert the loaf from the banneton into the Dutch oven. Score the top of the loaf with a sharp knife or lame (a specialized bread scoring tool) to control expansion during baking. A simple cross-shaped score works well.
- Cover the Dutch oven and bake for 30 minutes. Then, remove the lid and bake for another 20-25 minutes, or until the crust is deeply golden brown and the internal temperature reaches 200-210°F (93-99°C).
- Remove the bread from the Dutch oven and let it cool completely on a wire rack before slicing and serving. Allowing the bread to cool completely prevents a gummy interior.
Recipe Adaptation and Customization

This gluten-free sourdough bread recipe provides a delicious base, but its true versatility lies in its adaptability. Experimenting with different add-ins allows you to create a wide array of unique loaves, each with its own distinctive texture and flavor profile. Remember that adding ingredients will alter the hydration and potentially the fermentation time, so careful observation and adjustment are key.
Adding seeds, nuts, and herbs introduces exciting textural and aromatic dimensions to your gluten-free sourdough. Seeds like sunflower, flax, or chia add a pleasant crunch and nutritional boost. Nuts, such as walnuts or pecans, contribute richness and a delightful buttery flavor. Fresh or dried herbs, like rosemary or thyme, impart a fragrant, earthy complexity. However, these additions can affect the dough’s hydration and rise, requiring slight modifications to the recipe.
Add-In Variations and Their Impact
The following table illustrates how different add-ins modify the final product. Note that these are guidelines; experimentation is encouraged!
| Add-ins | Effect on Texture | Effect on Flavor | Recipe Adjustments |
|---|---|---|---|
| 1/2 cup sunflower seeds, 1/4 cup chopped walnuts | Adds a delightful crunch; slightly denser crumb | Nutty and subtly sweet; enhanced savory notes | Increase hydration by 1-2 tablespoons of liquid. May require a slightly longer fermentation time. |
| 1/4 cup chopped rosemary, 2 tablespoons olive oil | Slightly more moist crumb; potentially less airy | Strong herbal aroma; savory and slightly bitter notes | Reduce hydration by 1 tablespoon of liquid to compensate for the added oil. Fermentation time may be slightly shorter. |
| 1/4 cup dried cranberries, 1/4 cup chopped pecans | Slightly denser crumb; chewy texture from the cranberries | Sweet and tart; nutty and rich flavor profile | No significant hydration adjustment needed. Monitor closely for proper rise, as the cranberries can absorb some moisture. |
Adjusting for Different Gluten-Free Flour Blends
The success of gluten-free sourdough relies heavily on the type of flour blend used. Different blends have varying protein content and absorption rates, directly impacting hydration and fermentation time. Understanding these differences is crucial for consistent results.
For example, a blend high in tapioca starch might require less hydration than one primarily composed of brown rice flour. Similarly, a blend with a higher protein content (e.g., incorporating vital wheat gluten, though not strictly gluten-free) might require a shorter fermentation time due to increased gluten development (or gluten-like structure development in the case of gluten-free flours). Always start with the basic recipe as a guide, and adjust the hydration in increments (1-2 tablespoons at a time) until you achieve the desired dough consistency. Observe the fermentation process carefully; a slower rise may indicate insufficient hydration, while a too-rapid rise could mean over-hydration.
Careful observation of the dough’s consistency and fermentation rate is key to mastering gluten-free sourdough baking with different flour blends. Don’t be afraid to experiment and find what works best for your chosen blend.
Baking the perfect gluten-free sourdough bread is a rewarding journey, a testament to patience, precision, and a deep understanding of fermentation. This recipe, with its adaptable variations and troubleshooting guide, empowers you to create a loaf that’s not just gluten-free, but genuinely exceptional. The satisfying crackle of the crust, the airy lightness of the crumb, and the complex, tangy flavor – these are the hallmarks of a truly masterful sourdough. So, embrace the process, experiment with different flour blends and add-ins, and savor the delicious results of your culinary adventure.
Key Questions Answered
Can I use a different type of gluten-free flour blend not mentioned in the recipe?
Yes, but be aware that different blends will affect hydration and fermentation times. Experimentation is key! Start with a small batch to test the results.
How long can I store the baked bread?
Store your bread in an airtight container at room temperature for up to 3 days, or freeze it for longer storage.
My starter isn’t very active. What should I do?
Feed your starter more frequently (every 4-6 hours) until it’s bubbly and doubled in size. Ensure it’s at the right temperature (around 70-75°F).
What if my bread is too dense?
This could be due to insufficient fermentation, incorrect hydration, or an inactive starter. Review your process and ensure proper fermentation times and hydration levels are followed.


